bracelet

All posts tagged bracelet

My Etsy Store: Crystal Bracelets and Kawaii Star Jewelry Set

Published April 9, 2013 by kurolace

Hi All… here’s one of those shameless plugs for my Etsy store, which I just added a few things to.

Mostly I added crystal memory wire wrap bracelets, but I also added one kawaii / pastel goth / gothic lolita necklace / bracelet set. Its made with purple stars and pink glass pearls.

The crystal and pearl bracelets are $5 + s&h, and the kawaii star bracelet/necklace set is $8 + s&h.

New additions to my store at www.etsy.com/shop/Kurolace

New additions to my store at http://www.etsy.com/shop/Kurolace

Advertisement

Etsy Finds: Black Hearts

Published December 18, 2012 by kurolace

Hi! I have another set of good Etsy finds for you. This time the search term was one of my favorite accessory/decorations: Black Heart / Hearts.  I love simple black hearts, and also sometimes not so simple (like filigree). It think they are the perfect mix of cute, elegant, and sophisticated.

So here we go….

Silver Trumpet Jewelry

Silver Trumpet Jewelry

To start off the list is a nice charm bracelet with large black hearts from Silver Trumpet Jewelry. There are a few other nice charm bracelets in that store as well. $32 isn’t exactly cheap, but keep in mind that making charm bracelets takes time and lots of materials. I would prefer if this bracelet had either bright silver metal parts, black, or bright gold. These days I just am not a big fan of the aged-bronze/brass look. (Although at one point that’s all I liked)

CBDahlia

CBDahlia

The next item is a bit of a twist on “Black Heart”… Typically I’m not into these anatomically correct hearts, but I thought it was clever in this case, and the fact that these are carved is impressive. So if you like that sort of “sarcastic” type of thing, these black heart necklaces are for you! The shop is CBDahlia and each necklace costs $38.

fikashop

fikashop

Of course, we can always make our own custom items, embellished with these cute black heart studs! They’re on clearance too! Just $4.52, from fikashop. I’ve never used studs before, but I’m under the impression that they are relatively easy to use.

The Washi Shop

The Washi Shop

If you aren’t familiar with Washi tape, its similar to masking tape because of its paper feel. I love it. Mostly I use it for mailing / packaging items in a pretty way. So you know I just love this black heart, lacey washi tape! Its from The Washi Shop and costs $2.50.

ecofriendly notebook from thisisit

ecofriendly notebook from thisisit

For anyone who likes to horde collect notebooks like I do, check out this “ecofriendly” notebook from thisisit. Its 8.5″x5.5″ and costs $18. You can choose between lined and unlined pages too, which is nice. I love cute school supplies and stationary – even though I’m no longer in school, hehe. Seeing this notebook actually made me think about trying to do something similar by using fabric… hmm I’ll have to try it out and maybe make a tutorial! 😛

nurdanceyiz

nurdanceyiz

Oh, I came across this great throw pillow during my search. Its a little bit pricey, but really cute. I wish my room was a little bit more “in-theme” and that my bed was big enough to have another throw pillow on it! I think I might prefer it with lace instead of that leaf stuff… but still, this is very cute. $42 from nurdanceyiz.

GlitznGlass

GlitznGlass

Lastly I found this mug with pained on hearts. The hearts kinda look like they have eyes! I’m sort of a sucker for mugs.. lol, I think it might have something to do with my tea obsession… The mug is hand painted and costs $18 from GlitznGlass.

Well, thats it! Hope you enjoyed looking at the pretties and maybe you have gained some inspirations! See you next time! 🙂

How-To: Easiest Bracelet Ever

Published February 21, 2012 by kurolace

Whether you are new to making jewelry, or an old-timer who just wants to whip up something fast, these stretchy bracelets are the easiest beading project I know of.

A nice & short supply list

One thing that makes them easy is the fact that you don’t need any pliers or wire cutters or crimps, etc. You just need:

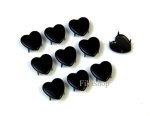
  • Some beads (I’m using black 6mm matte glass beads & flat diamond-shaped red glass beads)
  • Stretchy Beading Cord – This comes in different colors and diameters, so make sure you get the right diameter for the beads you are using.
  • Hypo-Cement
  • Scissors and a measuring tape or ruler

You should be able to find every thing you need at your local hobby / craft store, but if not, you can certainly find it online.

One of the most important things about making a stretchy bracelet is to make sure you make it the right length. It needs to be long enough to fit around your wrist comfortably, but short enough that it doesn’t fall off your hand. If you are making the bracelet for yourself, you can measure your own wrist to get an idea of how long to cut the cord. If you are making the bracelet as a gift, or to sell, then you can usually go by the guideline of about 7-7.5″ for most adults. (7.5″ is usually a bit too long for these stretchy bracelets though) Cut the cord to at least 8.5 inches just to be safe – this way you’ll have enough for when you make the finishing knot.

If you are using really big beads, you’ll need to make the bracelet longer. If you use really small beads, you’ll make the bracelet shorter. So as

I actually only cut the cord to 7.5", which was almost too short. I barely could tie the knot!

you string the beads,  keep checking the length of the bracelet by wrapping it around your wrist.

Once you’ve got it to the proper length, you’ll need to tie a knot. I use a basic square knot (right over left, left over right).

Now the awkward part… Before you pull the square knot tight, you need to put a dab of hypo-cement in the middle of the knot. Then pull the knot tight, and hold it for a few minutes as the glue sets. Try not to get any glue on the beads next to the knot.

Let the knot dry completely – say, about 10 minutes to be sure. Then try the bracelet on. Take it off, put it on, pull on the cord a little bit to make sure the glue & knot hold.

Finished!

If you used a small enough (diameter) cord, with beads that have larger holes, you might be able to stick the cord ends back through the beads. Otherwise, trim the cord down so that there is only about 2 mm on each side of the knot.

Voila! You’ve got yourself a bracelet. You can wear just one, or make a few to mix & match.

A few extra notes:

  • If you are planning to sell the bracelet or to give it as a gift, please take if for a “test drive” : Wear it for at least a few hours or a full day, to make sure the knot holds.
  • You can use a crimp bead & cover on the larger diameters of cord if you want. This way you cover the knot up.
  • Clean the tip of the hypo-cement off before trying to put glue on the knot. Having old, semi-dried globs at the end can make the knot look messy.
  • You can string a lot of bracelets and then knot and glue them all at once (This way you only have to uncap & use the hypo cement once). I use those clamp-paper clips (the ones with the black clamp) at each end of the bracelet in order to hold the beads on the cord.

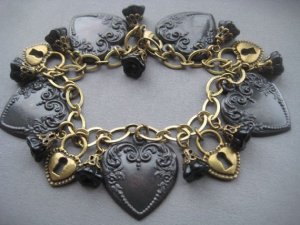
Some of the many stretchy bracelets I've made.