crafts

All posts tagged crafts

How-To: Make Satin Cord Necklaces for Pendants

Published April 27, 2013 by kurolace

Today I am going to show you why you don’t ever need to buy premade cord necklaces for you pendants! Seriously people, premade ones are a rip off, and if you are selling your item, they cut into your profit margin significantly! Making satin cord necklaces (or cotton cord or leather cord ones, for that matter), is really very easy and only takes a few ingredients!

From top to bottom: Rattail (nylon), Mousetail (Rayon), Bugtail (Rayon).

From top to bottom: Rattail (nylon), Mousetail (Rayon), Bugtail (Rayon).

Before getting into the tutorial, lets talk satin cord for a minute. This is my cord of choice. I typically prefer it over cotton and leather because it is much more flexible and therefore drapes better. Its even better than chain or ball chain in many cases, but of course this depends on the overall look you are going for.

There are two types of satin cord: Rayon and Nylon/Polyester. Rayon is a bit softer and the type that I prefer. You cannot heat seal rayon, because its mostly natural fiber, but you can use clear nail polish on the ends to keep it from fraying (Or glue, or that “no fray” stuff).  Nylon/Polyester cord has a slightly stiffer body, can be heat sealed, and is the type you’ll find at Hobby Lobby in the ribbon section.  Both Rayon and Nylon/Polyester Satin cord comes in a variety of colors, and in 3 sizes: Bugtail (1-1.4mm, also called “Petite #0”), Mousetail (1.5 -1.9mm, also called “Lightweight #1”), and Rattail (2mm also called “Heavyweight #2).

Check out The Satin Cord Store to buy either rayon or nylon satin cord by the yard, in 10 yard coils, or 70-yard rolls. You can also get it from Firemountain Gems – I believe theirs is nylon – in all three sized & many colors. Hobby Lobby only carries the heavyweight nylon satin cord, but its only $1.99 (or less if you go when its on sale), for 24ft (8 yards), and they have a decent variety of colors.

The rest of the supplies for this tutorial can be bought from your favorite jewelry supply store – In my case, Beadaholique, but Hobby Lobby or Michaels may also have what you need.

Okay… lets gather our materials, to make a satin cord necklace you will need:

I apologize... the lighting only gets worse from here.

I apologize… the lighting only gets worse from here.


  • Petite #0 / Bugtail Satin Cord (you can choose any length, of course – 18″ is usually the shortest length for this type of necklace)
  • Glue, nail polish or other sealing method
  • 2 Coil cord ends to fit cord (for Bugtail, you need 1.5mm)
  • 2 jump rings
  • 2″ Extender chain
  • Lobster clasp
  • Chain Nose Pliers
  • E6000 or similar permanent glue with some working time (not superglue)

To start, cut the Bugtail cord to the length you desire. Remember 18″ is usually the shortest length for these pendant necklaces. I actually prefer 21″… Obviously you can choose the length you prefer. We will be adding a 2″ extended chain, so remember to add that in when calculating the total possible length of the finished necklace.

When putting the glue on the cord, and inserting into coil, try to avoid the end of the coil on the left side of this picture.

When putting the glue on the cord, and inserting into coil, try to avoid the end of the coil on the left side of this picture.

Seal the ends of the cord. Use glue or nail polish or “no fray” if you are using Rayon cord. Use a lighter, candle, or heat tool if you are using nylon cord. A light touch is best for this step, especially with the glue or nail polish – too much and it’ll wick into the cord and discolor it.

Apply a small amount of E6000 to one of the ends of the cord. The slip the cord into the coil end. Push it all the way in. Clean up any excess glue on the cord.

Do the same with the other end of the cord. Allow the ends to complete dry… I usually leave them for about an hour or so just for good measure.

See where the coil wire end has been clamped down?

See where the coil wire end has been clamped down?

Take your pliers and clamp down the end of the coil onto the cord. I try to avoid splitting

the cord, and I try to keep the cord centered in the coil…. but it doesn’t always come out perfectly. Don’t worry too much about that. Its only crazy nit picky people like me who notice!

Add jump rings, then extender chain and lobster clasp

Add jump rings, then extender chain and lobster clasp

Put a jump ring on each end. The add a lobster clasp to one end, and the extender chain to the other end.

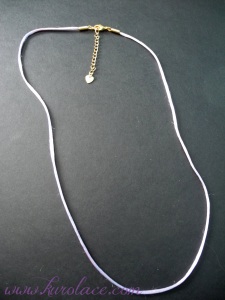
Voila! You have a nice satin cord necklace for your pendant!  Make a whole bunch at one time, in a few colors, so that you have them on hand to add finished pendants to later!

In case your wondering, this cord is actually "lavender" you just can see it due to the glare.

In case your wondering, this cord is actually “lavender” you just can’t see it due to the glare.


Etsy Finds: Nails

Published January 11, 2013 by kurolace

Hiya! I’ve been away for a while because I’ve had a rough week. A week ago I started having some weird feeling in my chest on the left side, and actually ended up going to the ER on Friday night / Saturday morning. They did an EKG and blood test, which all came up normal, and told me I was probably having anxiety or something… But then less than 24 hours later I had chills and a fever, and ended up in bed for like 3 days. I’ve gotten a little better, but still am getting a sensation of weight/pressure in my chest. I spoke with a nurse on the phone for a while yesterday, and she relayed all my symptoms to my doctor, who said it seems like I have a viral infection or something. It’s a week until I can actually go to the doctors office… so I am supposed to just rest and not go outside much until then.

I missed some work at the beginning of the week since I was still really weak, so now I have to work extra to make it up… So while dragging myself through the extra hours of work I decided to go on Etsy and enjoy some browsing. I had a few search terms of course…. but I finally decided to do this post on the search term “nails.”

You’ll find that a lot of people sell nail stuff on Etsy these days. A few years ago, there wasn’t nearly as many people seeing acrylic sets or other nail items… I haven’t included any nail polish (which plenty of people are selling), but some other interesting nail items. 🙂

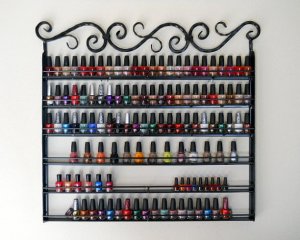
Holds about 144 bottles of polish!

Holds about 144 bottles of polish!

To start out with, I found some organizers. I don’t know about anyone else, but I have bottles of polish all over the place, lol. Especially around my computer, since that’s were I often paint my nails (while working, lol). But recently I’ve been thinking it would be nice to get a rack to store my polishes in. The nicest one I found on Etsy is the “Hanging wrought iron nail polish rack” from daisypam2011. I love the scroll work and elegant design. Its a bit out of my price range though, at $275. There are larger ones available as well.

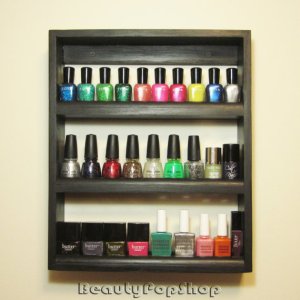
This one holds about 27 OPI bottles.

This one holds about 27 OPI bottles.

Quite a bit more affordable is the “Petite ‘Nice Rack’ Floating Polish Rack” from BeautyPopShop. Its available in black or white and costs 25.  The petite rack is probably just about big enough for my current polish collection, but the shop also carries larger ones with different numbers of tiers. There are also some colorful racks available.

If you don’t have many nail polishes, perhaps you’d like to try your hand at Frankenfrankenkit Polishes? Making Franken Polish is particularly good for people who like glittery polishes… since that is the easiest way to Franken a polish. (Mixing colors is a bit more tricky). I found this great “Franken Nail Polish Kit” from SillyLilyPolish. It would make a great gift for someone else, or for yourself! Its $35 and includes lots of different glitter, tools, and 15 mini polish bottles with clear “glitter suspension” polish  to make/store your creations in.

2mm Rhinestones are perfect for nails.

2mm Rhinestones are perfect for nails.

If you’re interested in doing 3d nail art, you’ll want to stock up on supplies like these 2mm Glitter Flatback Rhinestones from colorfuldaysdiy. There are 12 colors in a wheel-style case…2400 pieces for under $7! I like to add rhinestones to my nails, either to enhance a sticker or decal design, or just on their own. Just make sure you coat the whole nail with clear polish afterwards in you want the rhinestone to stay on a long time.

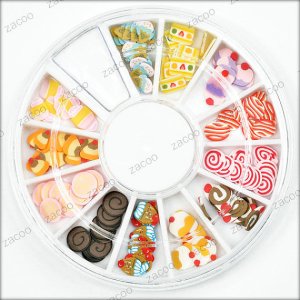
Ice cream, chocolate, and cake, oh my!

Ice cream, chocolate, and cake, oh my!

Polymer Clay slices are a popular design element on Etsy. You can find a huge range of them, pre-sliced, or sometimes in cane (un-sliced form). I prefer getting them pre-sliced and in the wheel storage boxes. I have some fruit ones, but there are a lot of other designs available. Check out these cute Food & Cake Slices from zacoo. There are ice cream cones, cupcakes, roll-cakes, and more. 120 pieces for $1.50. I would recommend using acrylic nail glue (which I never use to apply fake nails – but more on that another time) to attach these (over dried nail polish – use a clear coat if you have bare nails). The slices don’t like to bend to fit your nail, so they need that extra strength to keep them on.

Lots of other designs in the same store!

Lots of other designs in the same store!

Of course, if you are too lazy to do your own nail art, you can buy pre-designed acrylic nails. I have several sets of these from my favorite Etsy nail tech, nevertoomuchglitter. Her nails are top notch quality and she can do custom sets if you want them. The only issue for me is that the “active length” nails are too short to cover my natural nails, but the “medium length” are too long (particularly in the thumbs). But I think that “active length” is usually appropriate for most people. Check out the Alice in Wonderland Silhouette nails that she has hand painted. The set of 22 nails costs $10.

If you want to try making your own acrylic nails, you can buy the blanks on etsy.

Try your hand at nail art.

Try your hand at nail art.

The blank nails that are on a “spine” are easier to handle while painting than individual blank nails. Here is a Make Your Own Fake Nails kit from SweetenedWithLove. It includes 4 sets of nails with optional base coat painting, nail glue, and some two-sided nail stickers for temporary wear. $7

BTW…The nail stickers are what I would recommend for applying acrylic nails, because they don’t damage your nail – however, they do start to come off after only a day or two (depends on how often your hands get wet). The other option for temporary application is Ducato repeating nail glue, which you can buy from nevertoomuchglitter, as well as some other etsy sellers. Using these temporary adhesives means you can use the nails again and again.

Okay, thats all! Hope you enjoyed!


Etsy Finds: Black Hearts

Published December 18, 2012 by kurolace

Hi! I have another set of good Etsy finds for you. This time the search term was one of my favorite accessory/decorations: Black Heart / Hearts.  I love simple black hearts, and also sometimes not so simple (like filigree). It think they are the perfect mix of cute, elegant, and sophisticated.

So here we go….

Silver Trumpet Jewelry

Silver Trumpet Jewelry

To start off the list is a nice charm bracelet with large black hearts from Silver Trumpet Jewelry. There are a few other nice charm bracelets in that store as well. $32 isn’t exactly cheap, but keep in mind that making charm bracelets takes time and lots of materials. I would prefer if this bracelet had either bright silver metal parts, black, or bright gold. These days I just am not a big fan of the aged-bronze/brass look. (Although at one point that’s all I liked)

CBDahlia

CBDahlia

The next item is a bit of a twist on “Black Heart”… Typically I’m not into these anatomically correct hearts, but I thought it was clever in this case, and the fact that these are carved is impressive. So if you like that sort of “sarcastic” type of thing, these black heart necklaces are for you! The shop is CBDahlia and each necklace costs $38.

fikashop

fikashop

Of course, we can always make our own custom items, embellished with these cute black heart studs! They’re on clearance too! Just $4.52, from fikashop. I’ve never used studs before, but I’m under the impression that they are relatively easy to use.

The Washi Shop

The Washi Shop

If you aren’t familiar with Washi tape, its similar to masking tape because of its paper feel. I love it. Mostly I use it for mailing / packaging items in a pretty way. So you know I just love this black heart, lacey washi tape! Its from The Washi Shop and costs $2.50.

ecofriendly notebook from thisisit

ecofriendly notebook from thisisit

For anyone who likes to horde collect notebooks like I do, check out this “ecofriendly” notebook from thisisit. Its 8.5″x5.5″ and costs $18. You can choose between lined and unlined pages too, which is nice. I love cute school supplies and stationary – even though I’m no longer in school, hehe. Seeing this notebook actually made me think about trying to do something similar by using fabric… hmm I’ll have to try it out and maybe make a tutorial! 😛

nurdanceyiz

nurdanceyiz

Oh, I came across this great throw pillow during my search. Its a little bit pricey, but really cute. I wish my room was a little bit more “in-theme” and that my bed was big enough to have another throw pillow on it! I think I might prefer it with lace instead of that leaf stuff… but still, this is very cute. $42 from nurdanceyiz.

GlitznGlass

GlitznGlass

Lastly I found this mug with pained on hearts. The hearts kinda look like they have eyes! I’m sort of a sucker for mugs.. lol, I think it might have something to do with my tea obsession… The mug is hand painted and costs $18 from GlitznGlass.

Well, thats it! Hope you enjoyed looking at the pretties and maybe you have gained some inspirations! See you next time! 🙂

Book Review: Crafty Superstar

Published May 5, 2012 by kurolace

Scan of the cover.

Author: Grace Dobush, 2009

Publisher: North Lights Books (Cincinnati)

ISBN-13: 987-1-60061-320-3

This book was an unexpected discovery I made one day while browsing the arts & crafts section at my local used/new book store.  I was actually looking for stitching patterns or crochet books, when I saw this book laying out in the book shelf’s “display” section. Lately I’ve been thinking a lot about setting up an Etsy shop, or maybe doing some consignment arrangement, in order to sell a few of the many crafts that I’ve made. It was a used copy, and marked down 50% of its “new” price, so I went ahead and bought it.

While I haven’t read straight through it, cover-to-cover, I have browsed it extensively. Its a very useful and practical guide to setting up a small craft business. I particularly found the parts about branding, copyrighting, and pricing to be useful (although, for copyrighting, the book basically says “get a lawyer”, lol). The book is peppered with various “case-study” type examples collected from successful artisans. Additionally, there are multiple appendices filled with lots of useful links and information at the end of the book.

Here’s a brief summary of each chapter:

Chapter 1: Do you DIY?

This chapter discusses the handmade / indie trend’s history and popularity, as well as suggesting that you do some serious thinking regarding your expectations and motivations for getting into selling.

Chapter 2: Biz Basics

This chapter is focused on all of the small and big things that you need to take into consideration when naming, organizing, and running a small business. Topics include pricing, boosting production, organizing a workspace, and keeping track of income/expenses and legal issues like taxes and copyright.

Chapter 3: Selling Out

This chapter includes information about different ways to sell your products. For instance: online sites like Etsy vs craft shows vs consignment shops. It also talks about building a website and customer service, and even bartering your crafts for services and goods!

Chapter 4: Indie Craft Shows

This entire chapter is devoted to the notion of selling at craft shows, which, despite the rise of the digital era, is still probably one of the most popular and most utilized methods of selling crafts. The chapter talks about things like applying for shows, prepping products, creating displays, networking while at the show, and hosting your own show.

Chapter 5: Get Noticed

This chapter is all about marketing your business and building up a customer base. There are some suggestions about getting coverage in magazine and blogs.

Chapter 6: Finding Balance

This final chapter is about balancing your day job, family, and craft job, as well as maintaining your inventory. It has a few recommendations regarding either reducing your crafting business, or increasing it to a full time gig.

There’s also a brief Epilogue, and then the following appendixes:

  • Appendix A: Forms and Templates
  • Appendix B: Craft Communities
  • Appendix C: Awesome Craft Blogs
  • Appendix D: Craft-Friendly Publications
  • Appendix E: Small Business Resources
  • Appendix F: Reading List
  • Appendix G: Online Consignment Shops
  • Appendix H: Samples
  • Appendix I: Major North American Indie Craft Shows

In A Nutshell: I am happy with is book and it was totally worth the $18 original price (I paid $9 – so, double yay!). Sure, you can find similar information and suggestions online, probably for free – but I appreciate having it all together in one place. Its sorta like having check list to work on item-by-item. If you are considering selling your crafts and want to do something more than just a one-time craft show, then I think this book and a worthwhile investment. 🙂

Hair Accessory Madness

Published February 22, 2012 by kurolace

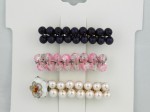
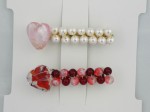
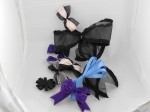
Hiya! Lately I’ve been somewhat obsessed with making hair bows, bead barrettes, and other hair accessories. So today I thought I’d show off a few of my creations. 🙂

For the beaded things, I use a mixture of glass beads and swarovski beads… I actually have a ton of crystals in my beading collection, but haven’t had anything to use them for… so I figured barrettes were as good as anything… After I use them up I’ll have to decide whether or not I want to stick with using glass beads / pearls, or keep using some crystal beads / pearls.

I bought some display /packaging cards at Hobby Lobby, because I thought I should maybe use them to help me remember which barrettes are made with which materials. However, considering the cost of the cards, and the fact that they are actually too big for the baby barrettes that I made, I might try making my own in the future using paperboard or something like that.

Okay, so here is the gallery of creations…

How To: Straighten Ribbons

Published February 14, 2012 by kurolace

I use a lot of ribbons to make hair accessories and jewelry… and sometimes I buy those “grab bag” deals at my local craft store. Inevitably, some of the ribbons are crumpled up… to the point of being unusable. But ribbons are expensive… so I don’t want to throw those crinkled ribbons away. Fortunately, there is a very easy, and fast, way to straighten ribbons.

Hair straightener & wrinkled up ribbon

All you need is the crinkled ribbon and a hair straightener. I think a large curling iron would also work, because large, loose curls in a ribbon aren’t obvious in most projects.

The process is simple and probably obvious to most people, but here’s a quick step-by-step:

Plug in the straightener and turn dial to lowest setting. Remember most ribbons are made from synthetic materials, which can melt if you use too high of a setting.

Slowly and firmly start to straight iron the ribbon. Start ironing just above the wrinkled part, moving slowly along the length of the ribbon to the end. Repeat this over and over until you notice the ribbon looking much better.

Depending on the type of ribbon you are working with, some creases might still be visible. The red ribbon pictured has a more paper-y feel to it, and still has creases… but it’s now much more workable than when it was all wrinkled up.  Straightening works very well on satin ribbons, although I sadly don’t have any pictures to show you that.

Yes, still creased, but much better than before!

So, there you have it… No reason to buy a fancy “ribbon straightener”… (yes, they do make these).

Cute Craft Kit: Fuwa Fuwa Fun

Published February 10, 2012 by kurolace

Boxed kits and a package of refill clay.

About a year ago I discovered some cute clay modelling kits from Japan, called “Fuwa Fuwa.” (In Japanese “fuwa fuwa” means something like “very soft.”) They follow in the tradition of cute miniature foods… which can be used in “deco-ing.” The kits include some clay, molds, glue, and rhinestones & other embellishments. The clay in these kits is something like paper / foam clay, which is extremely lightweight and air dried. While the clay is still moist, it smells a tiny bit, but that goes away once it dries. Some of the kits come with a special “mousse” clay which is very soft and can actually be pipped just like frosting. If you use up all the clay that comes in the kit, you can also buy extra clay (the normal bricks or the mousse clay). It comes in a several different colors, including pastels colors, “chocolate” colors, white, and even some “sparkly” colors.

The kits have different themes like: chocolates, doughnuts, deli, ice cream, etc… The first kit I bought was for making miniature sweets to use as charms / cabs. It included the eyepins, charm loops, and even a ball chain necklace. It even included a bonus antique key plastic charm. Although the instructions are in Japanese, there are illustrations – not to mention that its pretty easy to figure out how to use the kits in general: put clay in mold, remove excess, carefully take out of mold, arrange pieces and glue together, allow to dry, and voila! – you have a cute mini doughnut, cookie, or whatever. The only annoying part was that the molds often leave seams – although you can work these out if you are willing to take the time to do it (in the picture below, you can see that I did NOT take the time to do this with all of the charms in the first batch I made, lol).

After having used up all the clay in my first kit, I thought it might be fun to get another couple of kits to make different things. I mistakenly assumed that all the kits made charm-sized items – which is not true at all. In fact, the last time I looked at etsy (which is where I bought my kits – in the “supplies” section), most of the fuwa fuwa kits make larger items. So please pay close attention when you’re choosing a kit.

I suppose that its fairly obvious that these kits are aimed at a younger audience, but I like them because they are so easy. Sitting and playing with the clay – pressing it into the mold, putting the pieces together – these are great stress relieving activities, in my opinion. Perfect for a day when I want to make something, but I’m feeling a little too tired to be super creative. I played with these a lot while I was studying for my comprehensive exams last spring! Also these kits might be a good starting point for someone who wants to get into making mini-foods – later you can graduate to making them without molds!

Fuwa Fuwa Charms

How To: Put Together a Crafting Kit

Published February 4, 2012 by kurolace

When it comes to craft supplies, there are a few basic, general items which you’ll use over and over – even as your crafting interests evolve and change. In today’s entry, I’ll list a few things that you might consider gathering together if you’re new to the world of crafts, or if you want to make a present for someone just getting started in crafts.

Image

Just some of the items you might like to include...


Here’s a list of some of the things you might want to include in your kit:

  • Scissors: One of the quintessential of crafting. You should (and probably already do) have more than one pair. Smaller, school-supply type scissors are usually good enough for paper cutting, getting into packages, trimming stay ends, etc… but having a nice pair of big utility scissors is handy too.
  • Measuring Tools: “Measure twice, cut once” holds true for crafts other than just sewing. Make sure you have at least 1 ruler on hand, but it can be nice to have a few extra so that you have multiple options. If you really can only afford one ruler, make it a metal / aluminum one – or one with a metal edge. That way you can use it as a straight edge when cutting with an Xacto blade. Also consider including a measuring tape, which is useful when you need to measure something that isn’t flat.
  • Glues: You should have at least one, good, multipurpose glue. A multipurpose glue is one that can adhere to a variety of materials / surfaces. Other specialty glues can be useful too, of course. Also, a basic glue stick is perfect for paper projects because wont wrinkle lightweight paper as badly as a liquid-glue will. Hot glue guns can be really useful, both for gluing and decorative purposes (using colored hot glue). One other alternative to glue is clear nail polish, which you can use for a varnish if you can’t justify buying an entire bottle of mod podge or spray varnish.
  • Sewing Kit: Having a few rolls of thread and some needles can come in handy whenever you want to use a few stitches to help secure something, or repair something. Sewing needles can also be useful as a tool to clear out a glue tip or to texture clay. You can buy sewing needles and thread separately, or you can just buy yourself a travel sewing kit.
  • Toothpicks: There are so many uses for these… like needles you can use them to help clear out the tip of a glue, but there are tons of other things you can do with them. I like to keep a box on hand because you never know when having that disposable, tiny tip can be really helpful.
  • Container / Box: Of course you’ll want to have something to store your supplies in. Depending on how much you have, you might need a big box or a little one. Or you might want to separate some of the items in to two groups for storage. You can get as fancy or as basic as you want: go the cheap way by using a large shoebox, or go ahead and get yourself a fancy-shmancy plastic art supply tote. Make-up train cases and Tupperware work well too.
  • Additional / Other Items: Razor blades, acrylic paints (the mini type), a compass, different types of tape, permanent markers and pens, colored pencils, cotton balls, Q-tips, or anything else you find useful on a regular basis.

(Keep in mind that if you’re putting together a crafting kit for a child, there are obviously some things that you might want to leave out.. such as Xacto blades and superglue.)

As you collect crafting supplies, you’ll find products that you like and don’t like, products that you use more than others, etc., so you’ll want to go through your crafting kit from time to time to update it. You’re also likely to develop more than one crafting supply box. For instance, I have a small one for clay & clay tools, one for jewelry tools, one for sketching, etc…

Thanks for reading and I hope this article may have given you some ideas for your own crafting life. 🙂