Hiya! I’ve been away for a while because I’ve had a rough week. A week ago I started having some weird feeling in my chest on the left side, and actually ended up going to the ER on Friday night / Saturday morning. They did an EKG and blood test, which all came up normal, and told me I was probably having anxiety or something… But then less than 24 hours later I had chills and a fever, and ended up in bed for like 3 days. I’ve gotten a little better, but still am getting a sensation of weight/pressure in my chest. I spoke with a nurse on the phone for a while yesterday, and she relayed all my symptoms to my doctor, who said it seems like I have a viral infection or something. It’s a week until I can actually go to the doctors office… so I am supposed to just rest and not go outside much until then.
I missed some work at the beginning of the week since I was still really weak, so now I have to work extra to make it up… So while dragging myself through the extra hours of work I decided to go on Etsy and enjoy some browsing. I had a few search terms of course…. but I finally decided to do this post on the search term “nails.”
You’ll find that a lot of people sell nail stuff on Etsy these days. A few years ago, there wasn’t nearly as many people seeing acrylic sets or other nail items… I haven’t included any nail polish (which plenty of people are selling), but some other interesting nail items. 🙂

Holds about 144 bottles of polish!
To start out with, I found some organizers. I don’t know about anyone else, but I have bottles of polish all over the place, lol. Especially around my computer, since that’s were I often paint my nails (while working, lol). But recently I’ve been thinking it would be nice to get a rack to store my polishes in. The nicest one I found on Etsy is the “Hanging wrought iron nail polish rack” from daisypam2011. I love the scroll work and elegant design. Its a bit out of my price range though, at $275. There are larger ones available as well.
This one holds about 27 OPI bottles.
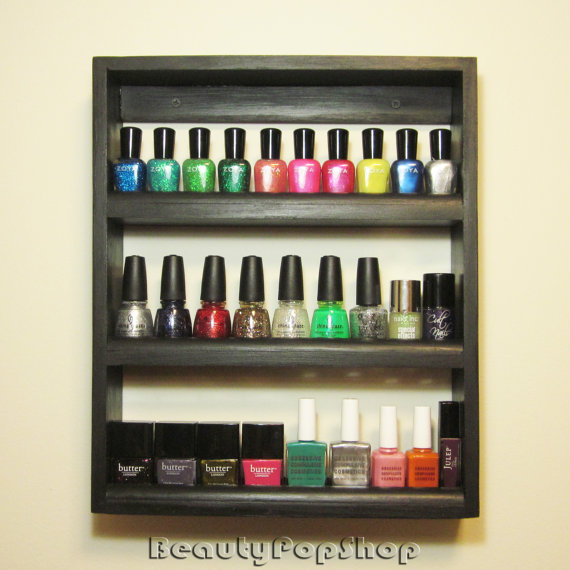
Quite a bit more affordable is the “Petite ‘Nice Rack’ Floating Polish Rack” from BeautyPopShop. Its available in black or white and costs 25. The petite rack is probably just about big enough for my current polish collection, but the shop also carries larger ones with different numbers of tiers. There are also some colorful racks available.
If you don’t have many nail polishes, perhaps you’d like to try your hand at Franken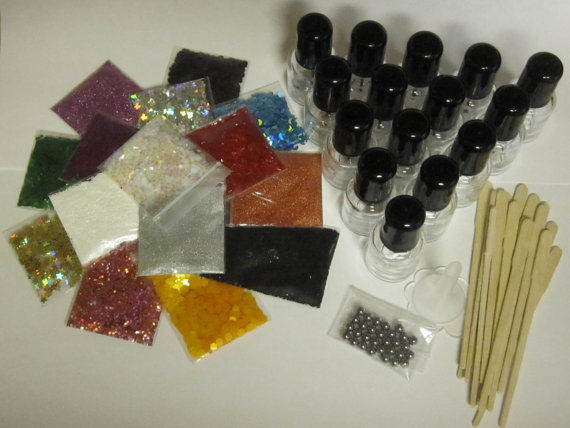 Polishes? Making Franken Polish is particularly good for people who like glittery polishes… since that is the easiest way to Franken a polish. (Mixing colors is a bit more tricky). I found this great “Franken Nail Polish Kit” from SillyLilyPolish. It would make a great gift for someone else, or for yourself! Its $35 and includes lots of different glitter, tools, and 15 mini polish bottles with clear “glitter suspension” polish to make/store your creations in.

2mm Rhinestones are perfect for nails.
If you’re interested in doing 3d nail art, you’ll want to stock up on supplies like these 2mm Glitter Flatback Rhinestones from colorfuldaysdiy. There are 12 colors in a wheel-style case…2400 pieces for under $7! I like to add rhinestones to my nails, either to enhance a sticker or decal design, or just on their own. Just make sure you coat the whole nail with clear polish afterwards in you want the rhinestone to stay on a long time.
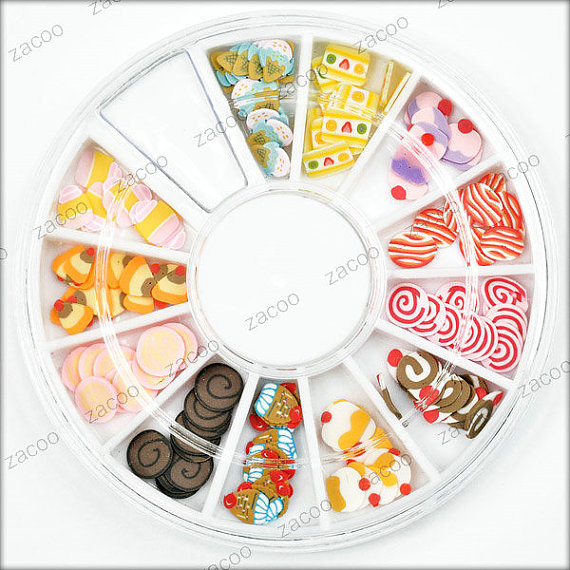
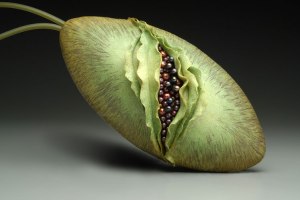
Ice cream, chocolate, and cake, oh my!
Polymer Clay slices are a popular design element on Etsy. You can find a huge range of them, pre-sliced, or sometimes in cane (un-sliced form). I prefer getting them pre-sliced and in the wheel storage boxes. I have some fruit ones, but there are a lot of other designs available. Check out these cute Food & Cake Slices from zacoo. There are ice cream cones, cupcakes, roll-cakes, and more. 120 pieces for $1.50. I would recommend using acrylic nail glue (which I never use to apply fake nails – but more on that another time) to attach these (over dried nail polish – use a clear coat if you have bare nails). The slices don’t like to bend to fit your nail, so they need that extra strength to keep them on.

Lots of other designs in the same store!
Of course, if you are too lazy to do your own nail art, you can buy pre-designed acrylic nails. I have several sets of these from my favorite Etsy nail tech, nevertoomuchglitter. Her nails are top notch quality and she can do custom sets if you want them. The only issue for me is that the “active length” nails are too short to cover my natural nails, but the “medium length” are too long (particularly in the thumbs). But I think that “active length” is usually appropriate for most people. Check out the Alice in Wonderland Silhouette nails that she has hand painted. The set of 22 nails costs $10.
If you want to try making your own acrylic nails, you can buy the blanks on etsy.

Try your hand at nail art.
The blank nails that are on a “spine” are easier to handle while painting than individual blank nails. Here is a Make Your Own Fake Nails kit from SweetenedWithLove. It includes 4 sets of nails with optional base coat painting, nail glue, and some two-sided nail stickers for temporary wear. $7
BTW…The nail stickers are what I would recommend for applying acrylic nails, because they don’t damage your nail – however, they do start to come off after only a day or two (depends on how often your hands get wet). The other option for temporary application is Ducato repeating nail glue, which you can buy from nevertoomuchglitter, as well as some other etsy sellers. Using these temporary adhesives means you can use the nails again and again.
Okay, thats all! Hope you enjoyed!